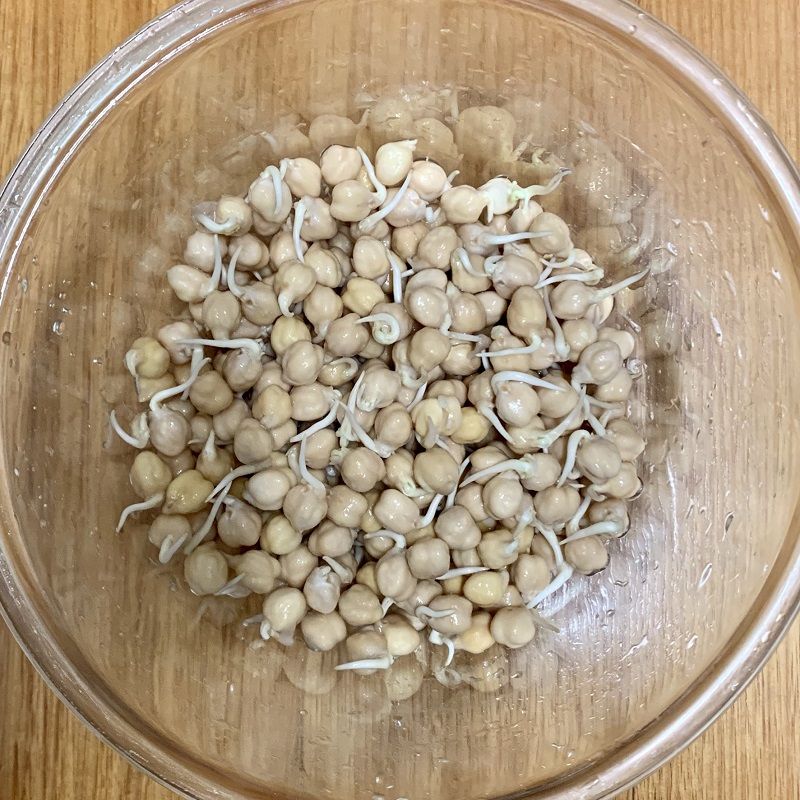
Making falafel is all about the chickpeas. To make an authentic tasting falafel, they can't be too soft, so using cooked chickpeas doesn't really work. It makes the falafel too mushy. However, using chickpeas that have only been soaked, can often make for a gassy time with digestion!! That's what I find, anyway. I have found that the perfect solution is to use sprouted chickpeas. I think what happens is, the sprouting process sets the growing process into motion, so the chemicals that make you gassy are reduced. In any case, using sprouted chickpeas has been a win for me.
Sprouting the chickpeas only takes 3-4 days. You can use the normal chickpeas that you buy for boiling. Amazingly, they all grow, which is stunning to see for the first time. I am about to write a blog about growing them, so come back soon to find out all about it 🙂
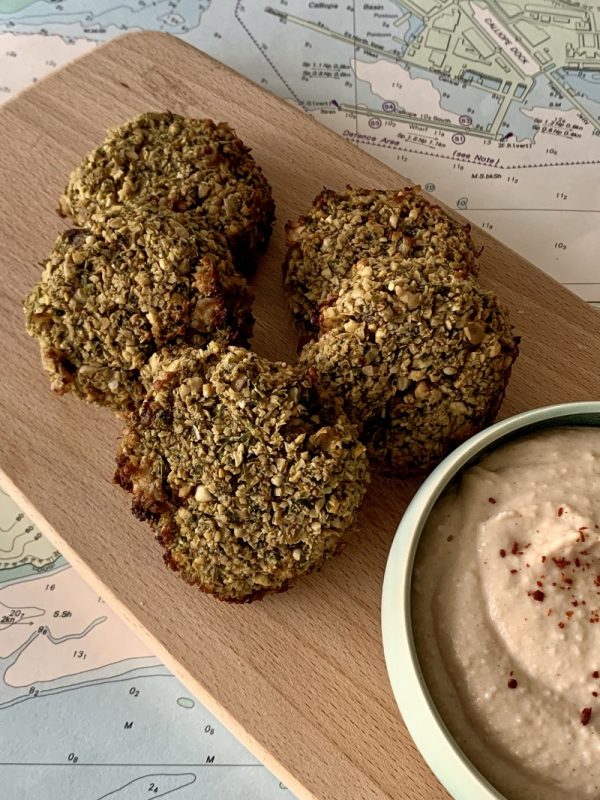
Baking the falafel in the oven means that they can get nice and crispy without the oil that is usually used to deep fry them. The texture is really good. Slightly crumbly when you cut into them, but they definitely hold their shape well.
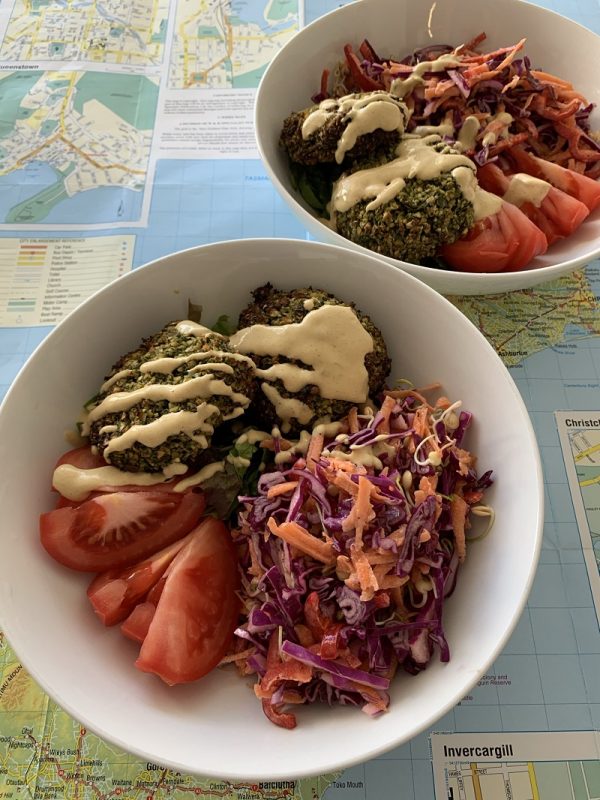
Here, I have served the falafel with a side of Butter Bean Dip. But the serving options are endless. See the recipe below for options.
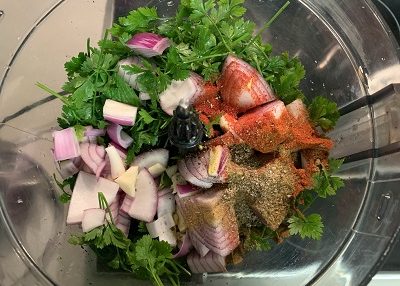
Add all but the chickpeas to the bowl of a food processor with the blade attachment. Process until well chopped and forming a paste. Stop and scrape down the sides of the bowl from time to time, to ensure even blending.
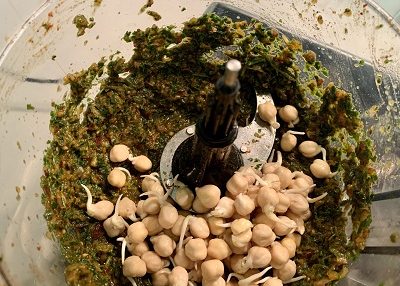
Add the sprouted chickpeas. Process until the chickpeas are finely chopped, and the mix is well combined. It will be slightly crumbly in texture.
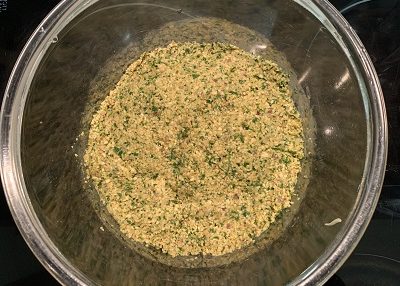
Transfer the mix to a bowl, use a spatula to press the mixture down, so the surface of the mix is even. This prevents the surface from drying out too much in the fridge. Place the bowl in the fridge, uncovered, for about 30 minutes to firm up.
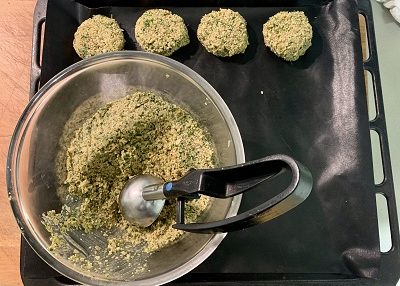
Take the bowl from the fridge, and shape the mix into patties. The easiest way is to make a ball shape first, then flatten it slightly onto the tray. I find that using a potato scoop to do this helps keep the size even. Place the falafel onto a tray lined with non-stick baking paper or a silicone baking sheet. The mix makes 10-12 falafel.
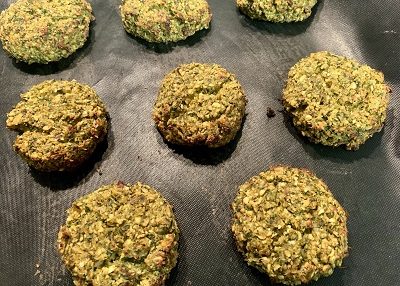
Bake in an oven at 180C until golden and crispy, approximately 25 minutes. Eat immediately, or cool and store in the fridge for up to a week, or in the freezer for up to three months. Reheating in the oven will ensure a crispy shell, but they also taste good heated in the microwave, if you are in a hurry.
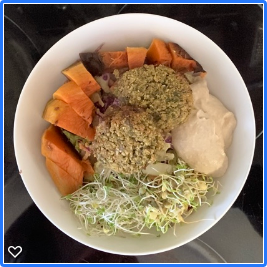
Falafel can be used in many ways. Eat them stuffed into a pita pocket with salad and a tahini based dressing and hummus. Add leftover falafel to your lunchtime salad bowl for a pop of protein. In the photo, I have also added leftover roasted pumpkin and a glob of Butter Bean Dip. Serve them with steamed vegetables and rice, drizzled with a tomato based sauce for dinner. They are a good make-ahead option to have in the fridge for quick weekday meals. Imagine away!!
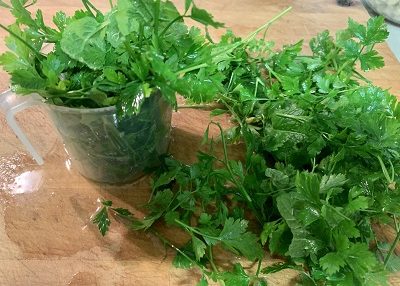
I have specified using just parsley in the recipe. Feel free to change this up, depending on the flavours you like. I often use some mint leaves in the mix. You can also substitute in some coriander or basil, if you have it. The trick is to use fresh herbs, as they add the right colour and texture.


Leave a Reply