This recipe is based on a brownie recipe first developed by the famous Chef AJ in the US. That recipe calls for date syrup, which I didn't want to use. I preferred the idea of using date paste as it is closer to whole dates, whereas syrup has had the fibre removed.
Date Paste is one of my "Kiwi Ingredients", and you can read more about it here.
If you have been reading my website, you will know that the cake/cookie person in our house is Steve. After the Christmas trial, he decided he wanted to work out how to make brownies that would fit into his weekly routine, allowing him to have a chocolate treat that didn't break the rules. So the trial process started, and he has now settled on this recipe!
Initially, we found that the date paste made the mixture too tight, so we added a banana to help loosen the texture. This worked well, but it made a rather thin brownie. So, then we added more banana and more oats to make the finished brownie more substantial.
Steve routinely adds dark chocolate drops to the top of the brownie, to give it that extra level of decadence. But you don't need to do this. The brownie tastes perfectly ok without them. If you want it to be even more decadent, however, chopped pistachios are a tasty addition.
In terms of working out if this is cooked enough, it isn't possible to test the brownie with a metal skewer. Just trust the time is enough. The brownie will seem slightly soft when you take it out of the oven, but will firm up once it cools. In fact, as brownies go it is more like cake than a gooey brownie.
Store the sliced brownie in the fridge, unless you think you'll be eating it all on the same day, for instance, if you are having people over or when you are taking it to work for a shared morning tea. A slice from the fridge tastes great with 10 seconds in the microwave just before eating.
Preheat the oven to 175C. Make sure you have a cooking rack halfway down the height of the oven, where you will put the brownie to cook.
In a food processor, using the S shaped chopping blade, add the bananas. Break them into segments about 5cm long. Then add the other ingredients.
Run the food processor until the mixture is smooth. During the mixing, open the food processor from time to time and push the mixture down the sides. This ensures all the ingredients are well mixed.
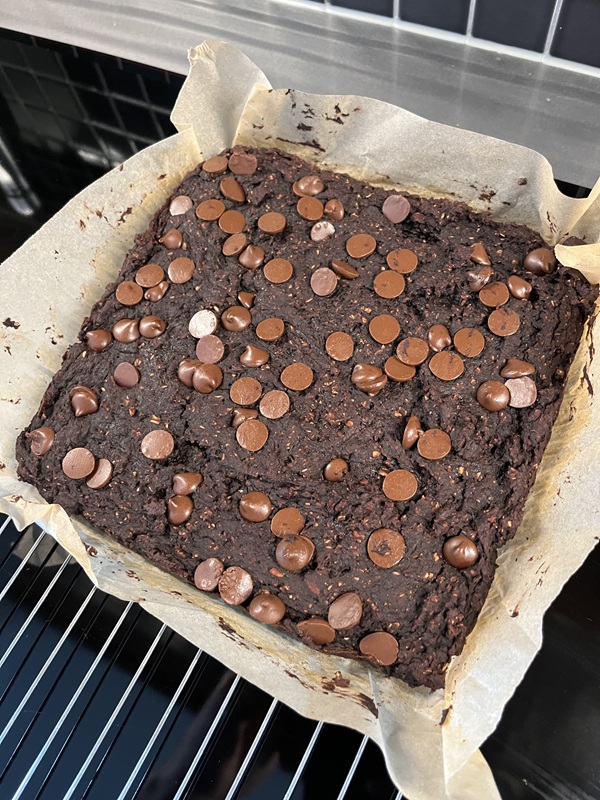
Line a 8" or 9" square cake tin with baking paper. There is no need to be fussy with how you do this. A flat piece of paper will be fine. Pour the mixture into the tin and spread it evenly, being sure to get it into the corners of the tin. See the picture below to see how it should look.
Add toppings, if using. Press them down gently to ensure they will stay stuck to the brownie once it is cooked.
Bake for 30 minutes. Do not be tempted to test if it is cooked, and trust that this amount of time is correct. Cool the brownie on a wire rack before removing from the tin and slicing - we usually get 16 slices per brownie. Store brownie in a container in the fridge. Microwave for 10 seconds before serving, if desired.
DATE PASTE
Date Paste is one of my "Kiwi Ingredients", and you can read more about it here.


Leave a Reply